
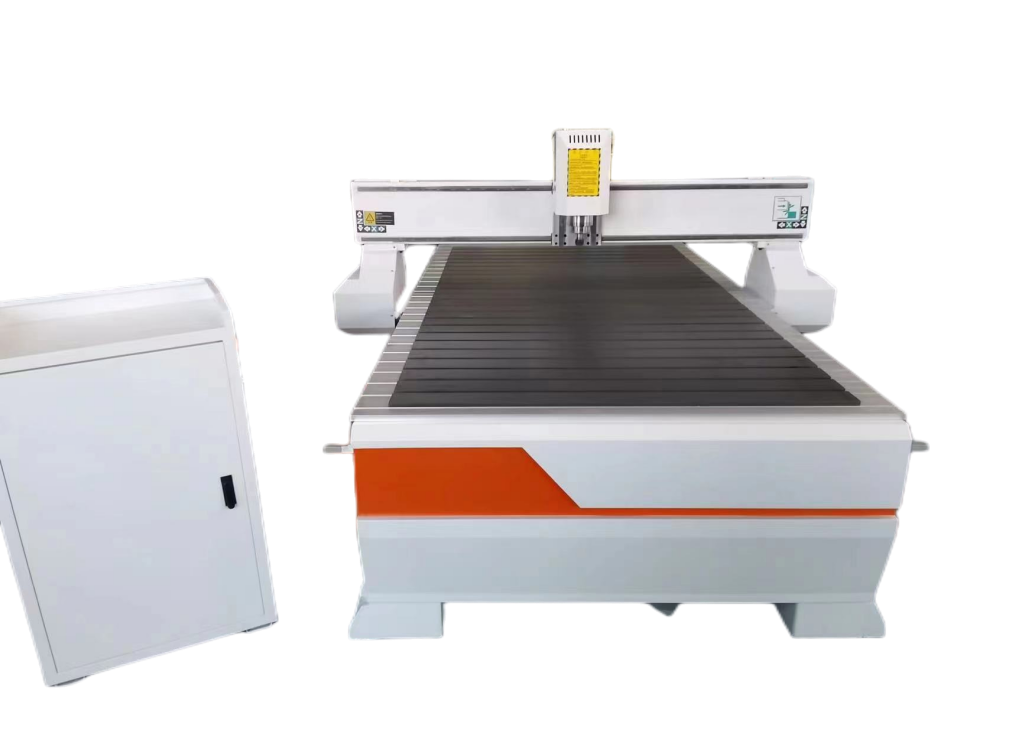
Speaking of woodworking CNC router machines, the first thing we might think of is the quality, model, processing functions and others of the CNC engraving machine. So how much do you know about the installation of the CNC router, operation and maintenance skills of the CNC machine, then APEXCNC will take you to learn it one by one. When we received the woodworking engraving machine, the first thing we faced was the installation of the machine.
The installation of the machine directly affected the quality of the machine processing and the length of the machine service life. Therefore, the installation of the machine plays a vital role in the whole process of the machine. The installation of the wood engraving machine is the combination of various parts of the machine, which seems very simple. However, the professional and reasonably assembly of various parts requires a lot of skills. Next, APEXCNC will tell you about the installation process and installation skills of some core components. First, lets take a brief look at the installation steps of the wood engraving machine.
1. Placement the machine
First, we need to choose a suitable placement for the CNC engraving machine. The choice of this location needs to consider the size of the engraving machine and whether the engraving machine needs to be connected to the wire. The machine should be close to the ground wire, and the machine should be placed in a clean, flat, ventilated and dry place. It should be noted that after debugging the machine, try not to move the position of the machine, otherwise it will be adjusted again.
2. Disassemble the packing box
After choosing a suitable placement position, the next thing we have to do is to open the packing box of the machine. At this time, we need to check whether the machine is damaged, and then check whether the appearance of the whole machine is scratched and whether the accessories are complete.
3. Install the machine
Installing the machine is also the focus of our talk this time. First we have to talk about the overall installation process of the machine.
3.1. First place the engraving machine on the flat ground.The four corners of the engraving body need to be adjusted and leveled. It is recommended to use a spirit level to adjust the table-top to level.
3.2. Fix the suction tube bracket on the side of the machine head and bed bracket respectively. There are screws on the fixed place. After removing, install the bracket on it.
3.3. Fill the water tank with water. The motor of the water-cooled spindle is cooled with water, so we fix a water tank on the chassis and add water from the water inlet.
3.4. Connect a total of four power cords on the back of the left chassis of the engraving machine to the three-phase power, and one black wire needs to be connected to the zero wire.Take out the control handle from the accessory box and connect the machine cable to the case, press the main switch, the display of the handle is on, prompt whether to return to the origin, press the OK button to return to the origin, the machine starts to move, the Z axis rises to the top, and the X axis returns On the left, the Y axis returns to the front of the fuselage. Check if the pump is working properly. Pull out the water outlet pipe and see if there is any water flowing out. After the water pump has been working for a long time, there is no water flowing out of the water pipe, then the water pump reverses, and the two lines input to the water pump are arbitrarily adjusted to replace the following to make the water pump rotate forward.
3.5. The dust hood with a brush is inserted from the bottom of the spindle cutting motor. The brush is lower than the position of a knife at the spindle clamping tool. Of course, this position is adjustable, mainly to achieve good vacuuming. effect.
3.6. Install the suction tube. There are three suction tubes, two of the same length and thin, and one section is thick and long. The other end needs to be connected to the vacuum cleaner. There are three suction ports for the vacuum cleaner, one of which is equipped with a sealing cover, and the other two are for taking over the head.
4. Installation details of accessories
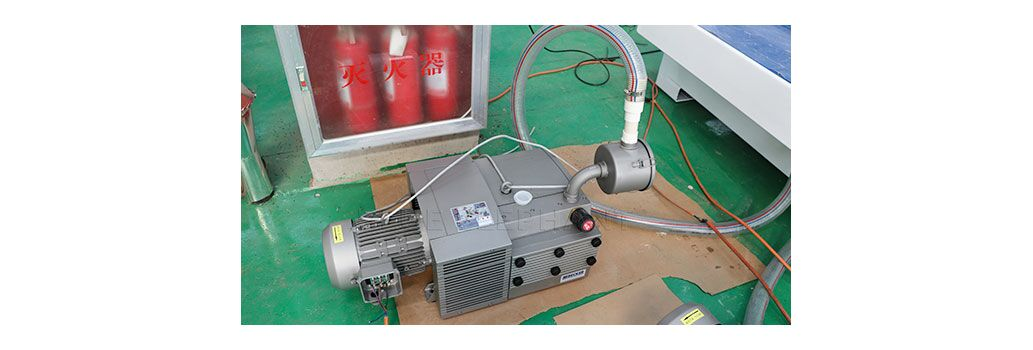
4.1 Installation of vacuum pump. Install the vacuum pump on a flat surface and fix it with bolts through the bolt holes on the bottom corner without special foundation or chassis. Wrap the pipe joint of the filter with sealing tape several times and screw it on the motor body above the check valve. Make sure the tightness of the connection between the two. Inject water from the water inlet until water flows out of the water outlet. After using for a period of time, the water volume will decrease and the water temperature will increase, so the operator needs to pay attention: add water frequently to the water outlet overflow and the water temperature does not exceed 80 degrees Celsius. It is recommended to connect the tap water pipe to the water outlet, and the water outlet or both can circulate to ensure sufficient water. Note: Do not run the vacuum pump dry The direction of gas in and out and the direction of rotation around the pump have been marked with arrows on the vacuum pump.
4.2 Installation of vacuum cleaner. Please installation according to the diagram outside the box. Connect the three-phase power, after the start, the dust bag must be opened or the motor reverses. It can be solved by arbitrarily switching two of them.
5.Test the machine
After the installation and inspection of the complete machine and components are completed, the machine switch can be turned on to make the standby device be turned on. Open the vacuum hood and feel the suction of the two pipes when reaching into the hand; if the head is reset, if it moves up and down, left, right, up and down normally. This proves that the machine can run normally.
The above is the installation process and attention details of the engraving machine that we talked about in this article. I hope it will help you when installing the machine.
Released by Jinan APEX Machinery Equipment Co., Ltd.
Post time: Dec-26-2022